QRaft a Memory Snowflake
Jennifer | July 10, 2020
Hi! I'm Jennifer with QRafting.com, and today I'm going to show you how to make a layered memory snowflake ornament using QRafting.com's file hosting and QR code generation.
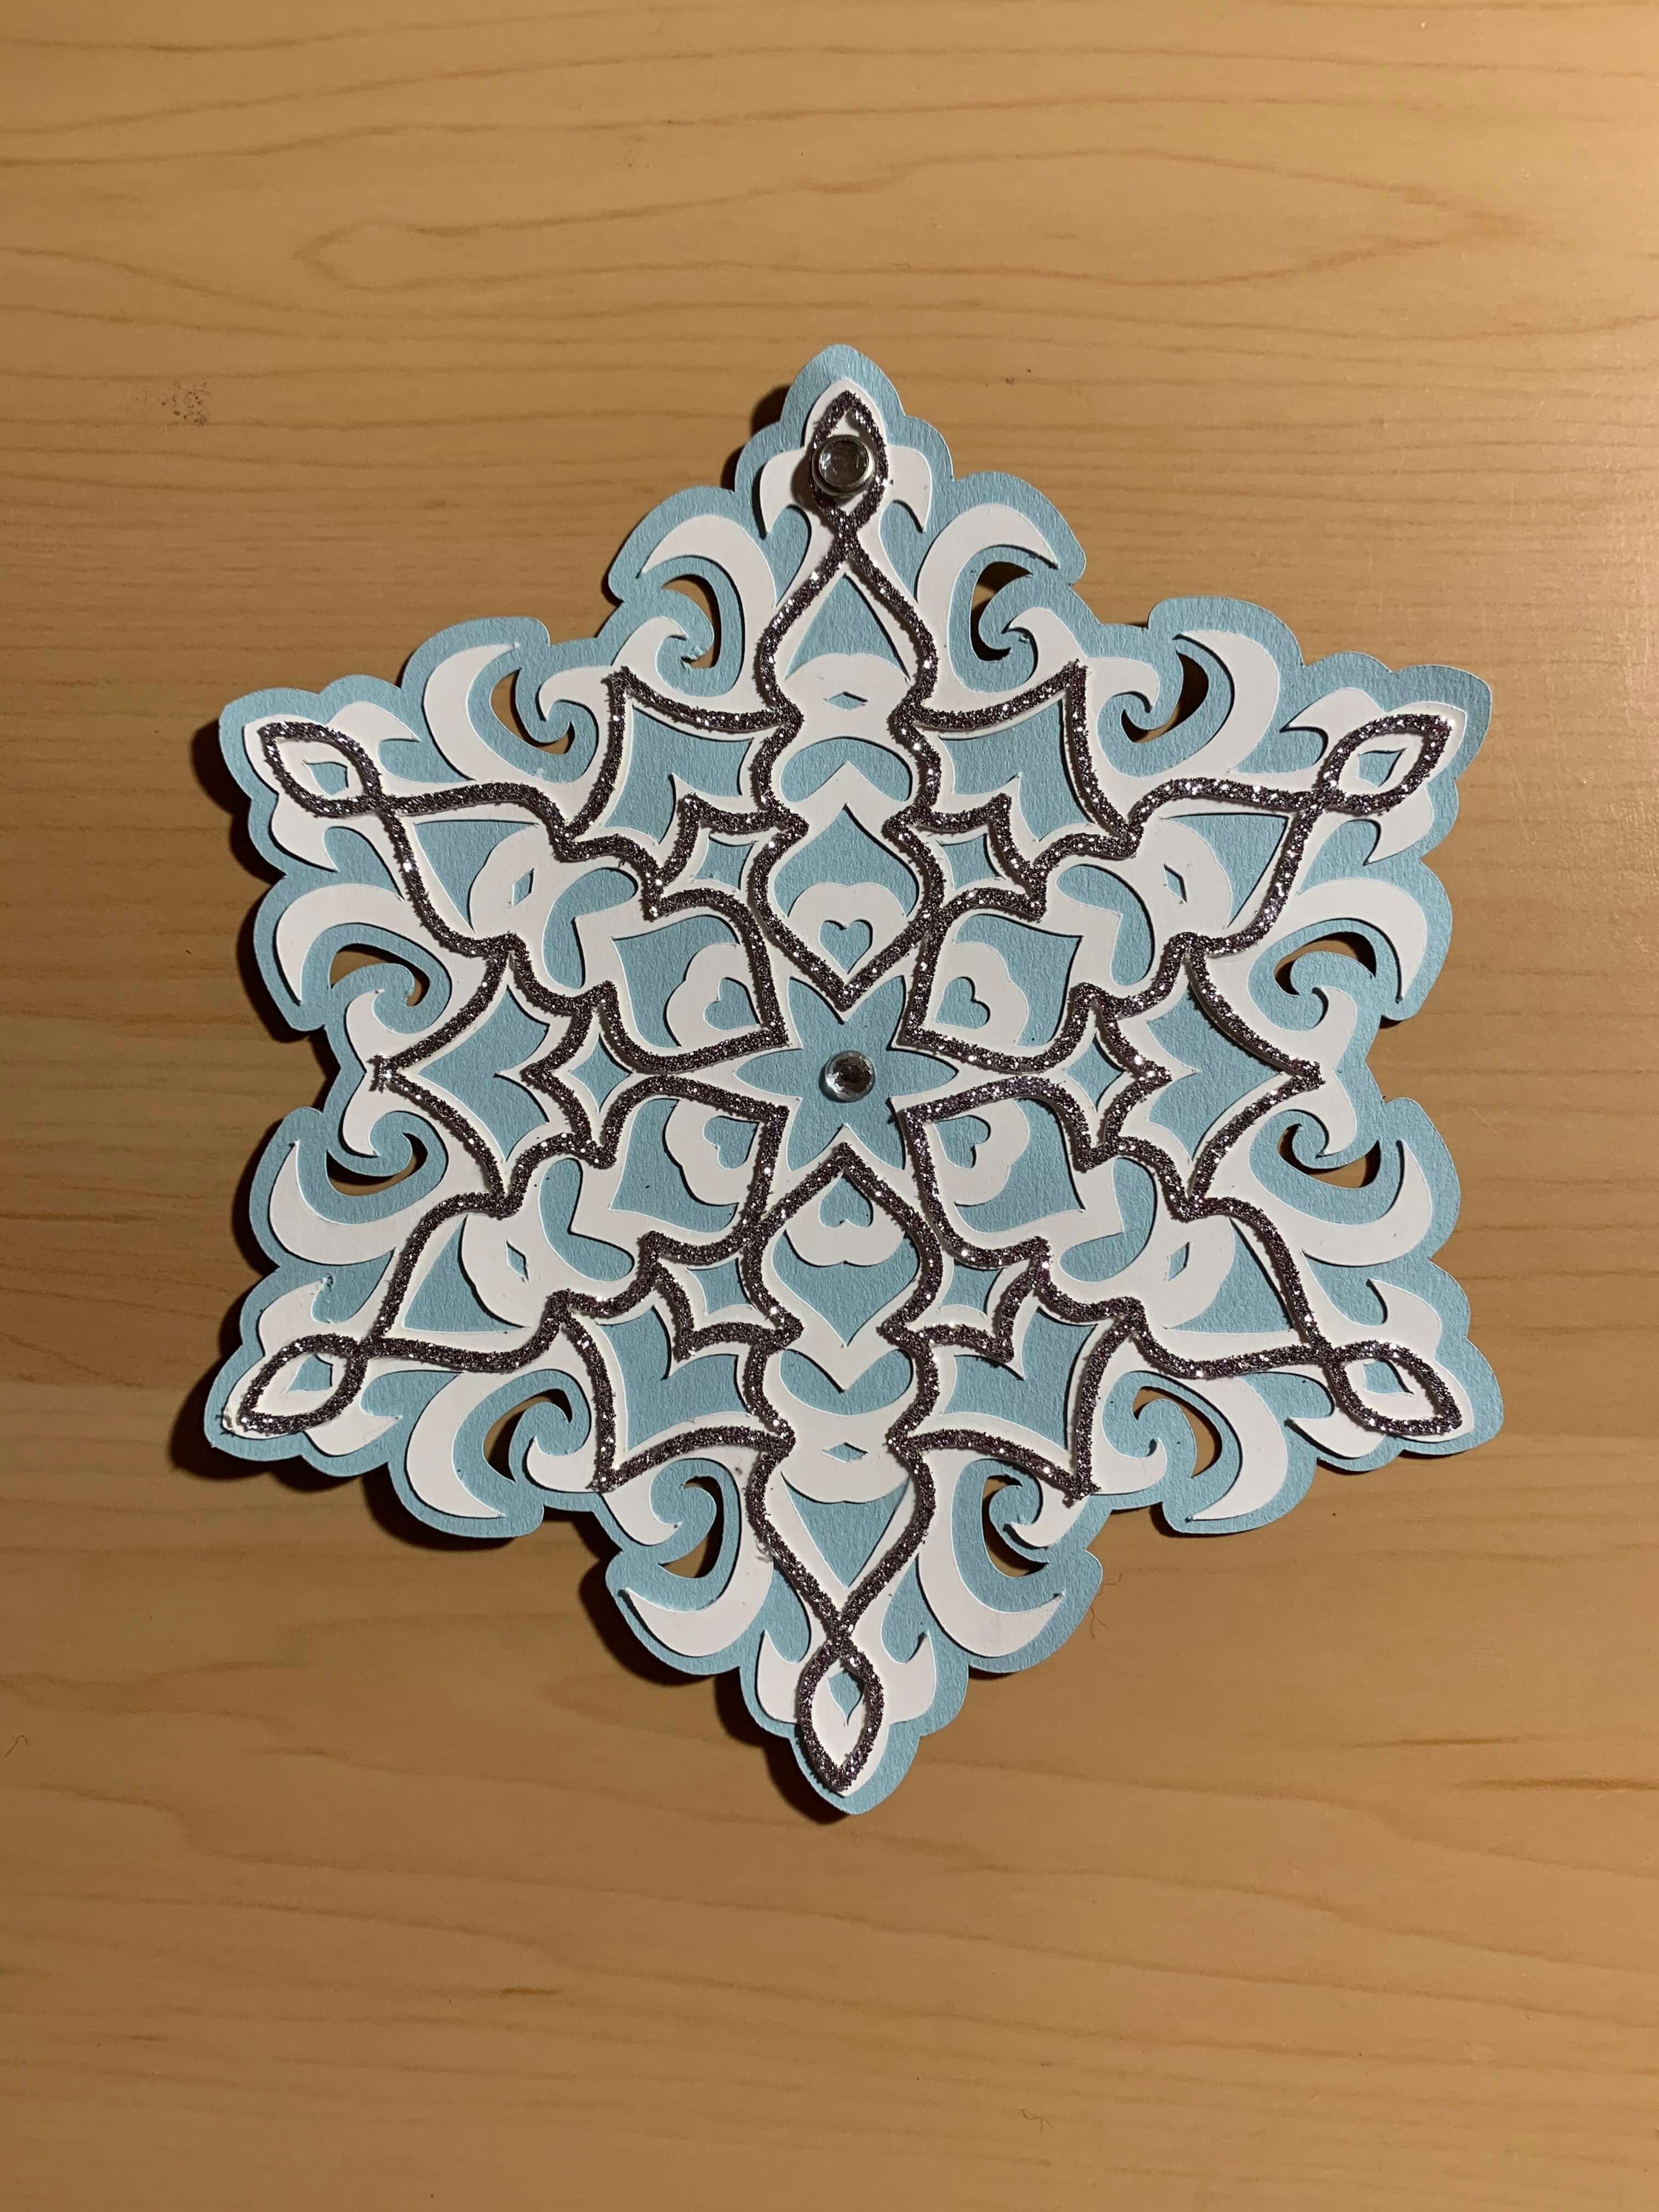
The layered snowflake SVG is included for your use at the bottom of this blog post or here. I recommend cutting it 5" wide from cardstock. I glued all three layers together, added a sparkly gem to the center, and a decorative brad at the top for a ribbon to attach so it can hang from the tree easily.
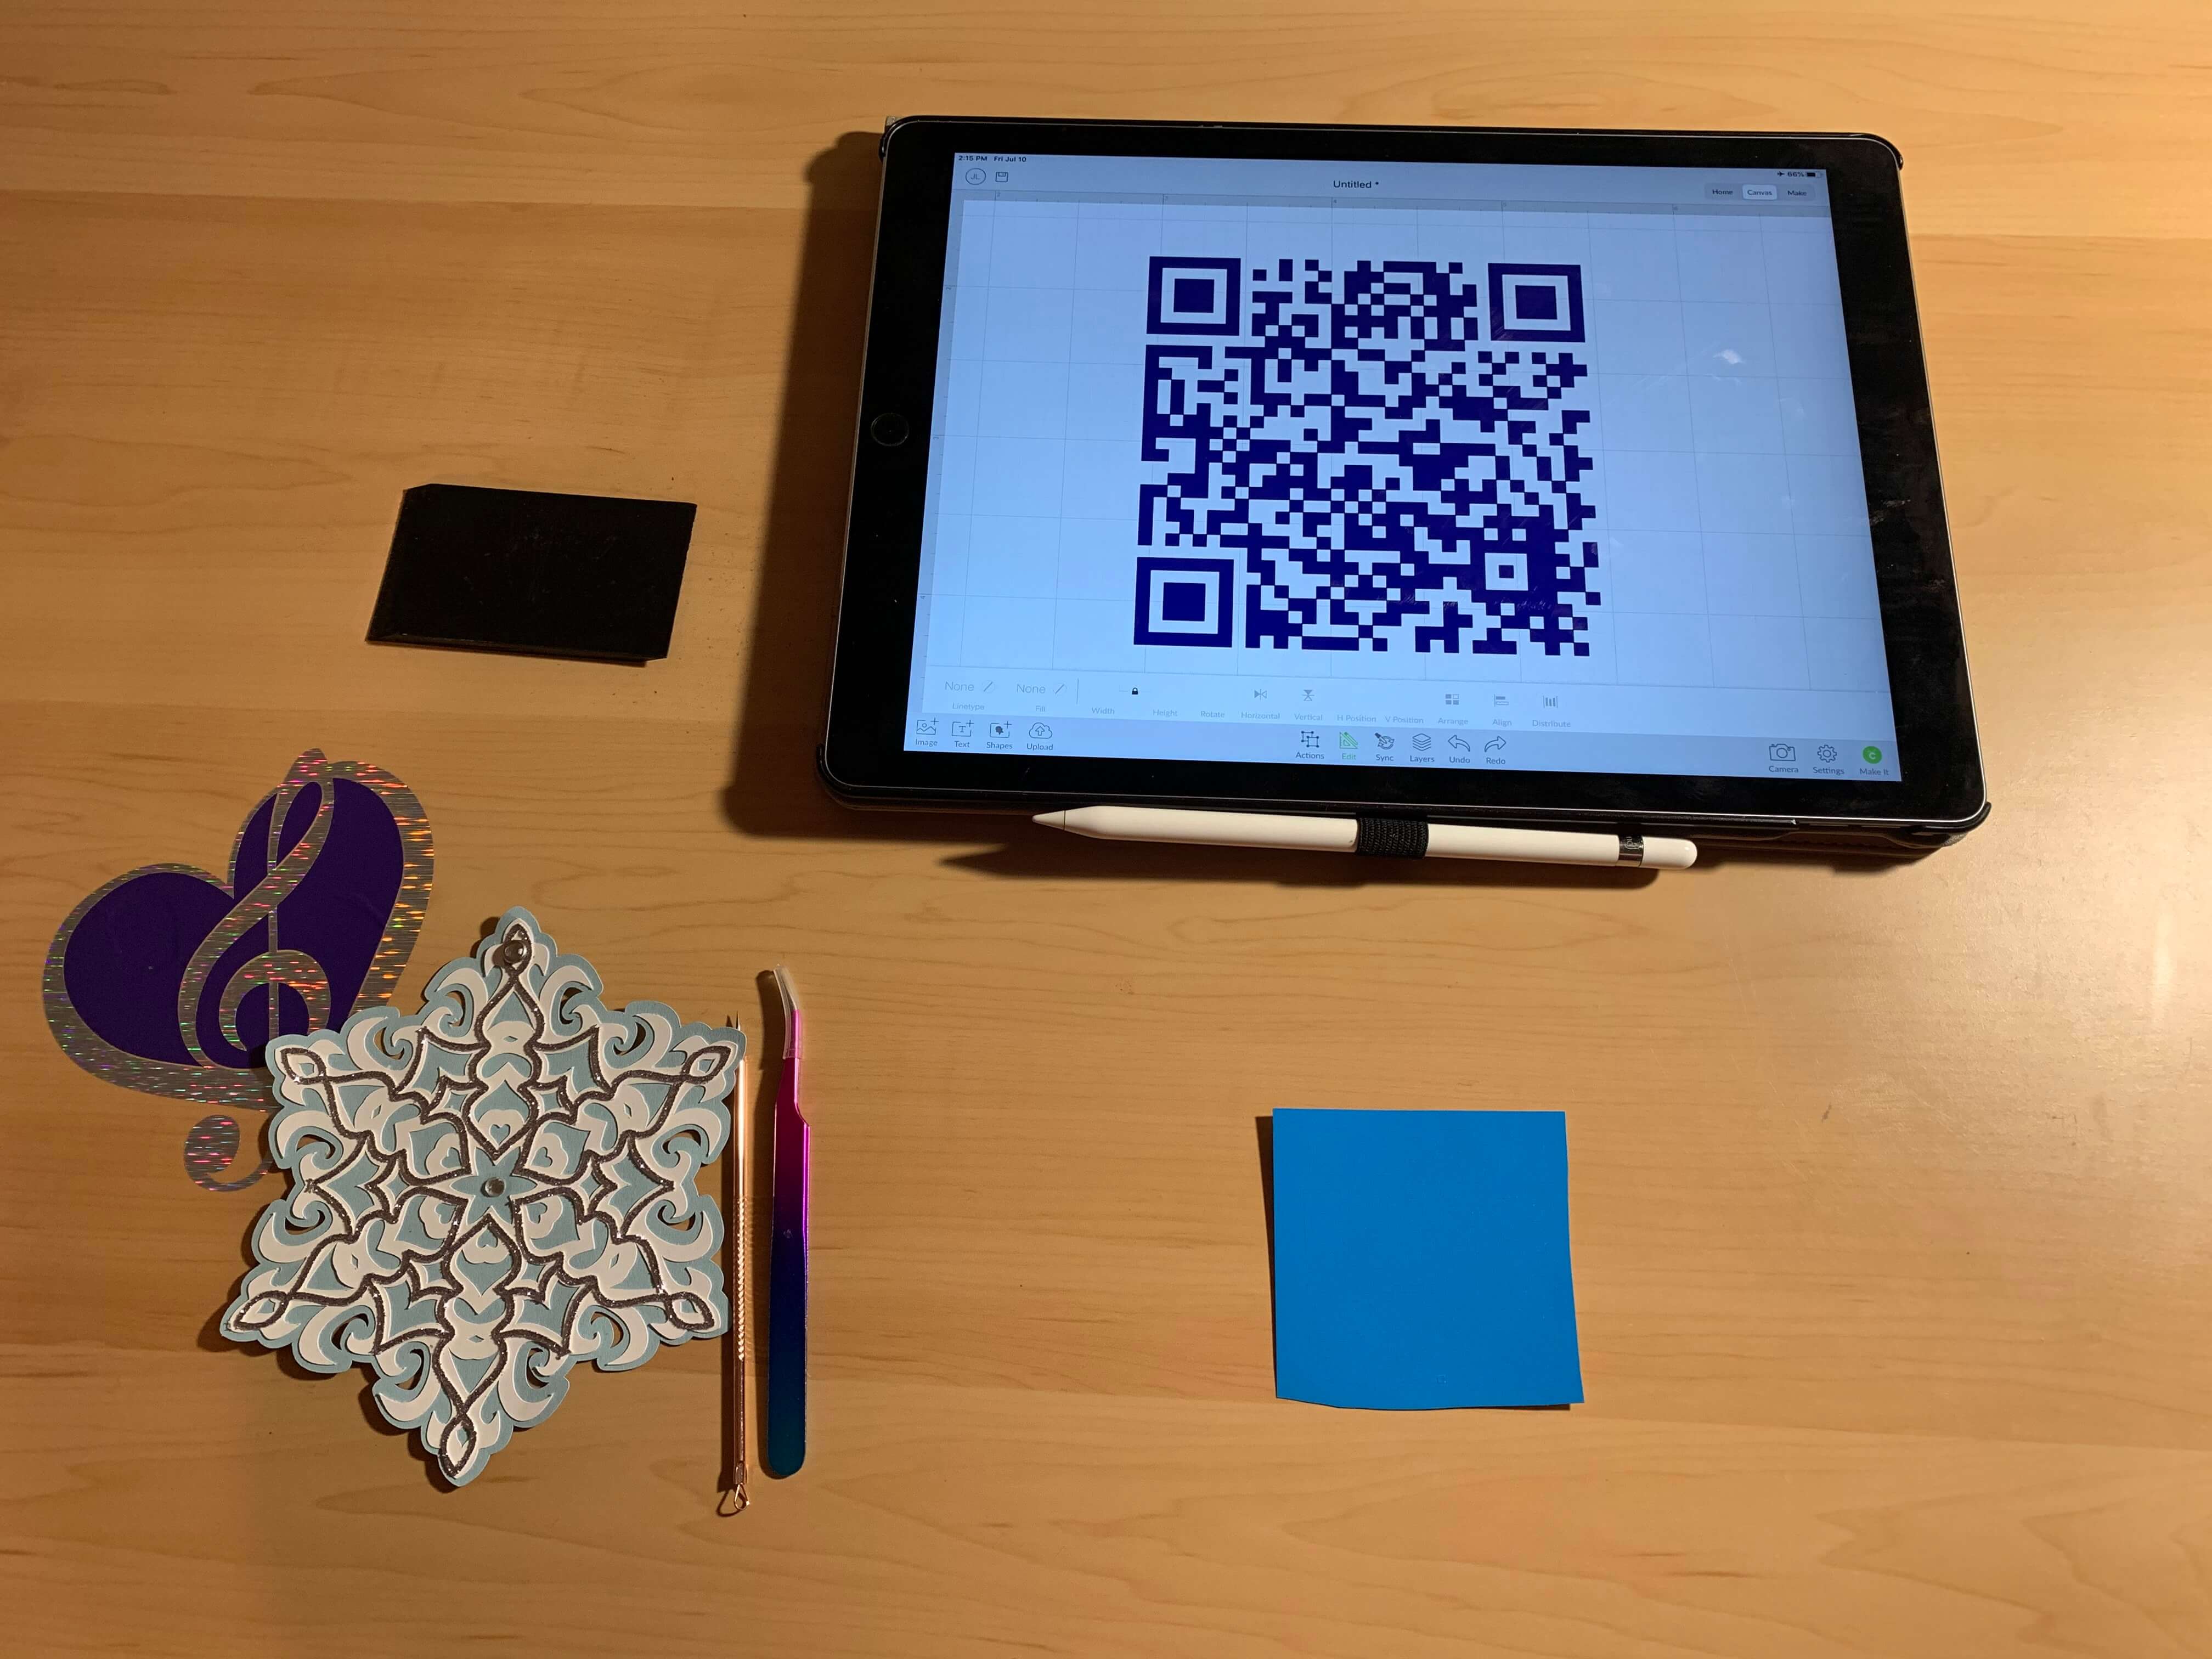
Once you've uploaded a photo and audio clip to QRafting.com, you will be provided with a number of file format options for your QR code. I downloaded the SVG file, then added it to my dropbox (though any cloud storage should work fine). I then imported the SVG file into Cricut Design Space.
I have an Explore Air 2, and I cut the QR code 2.5" wide on the vinyl setting using Oracal 651 permanent vinyl. I recommend using a solid color as opposed to holographic or glitter vinyl - while they can work, the variation in color and light texture can make the QR codes difficult for your camera to pick up.
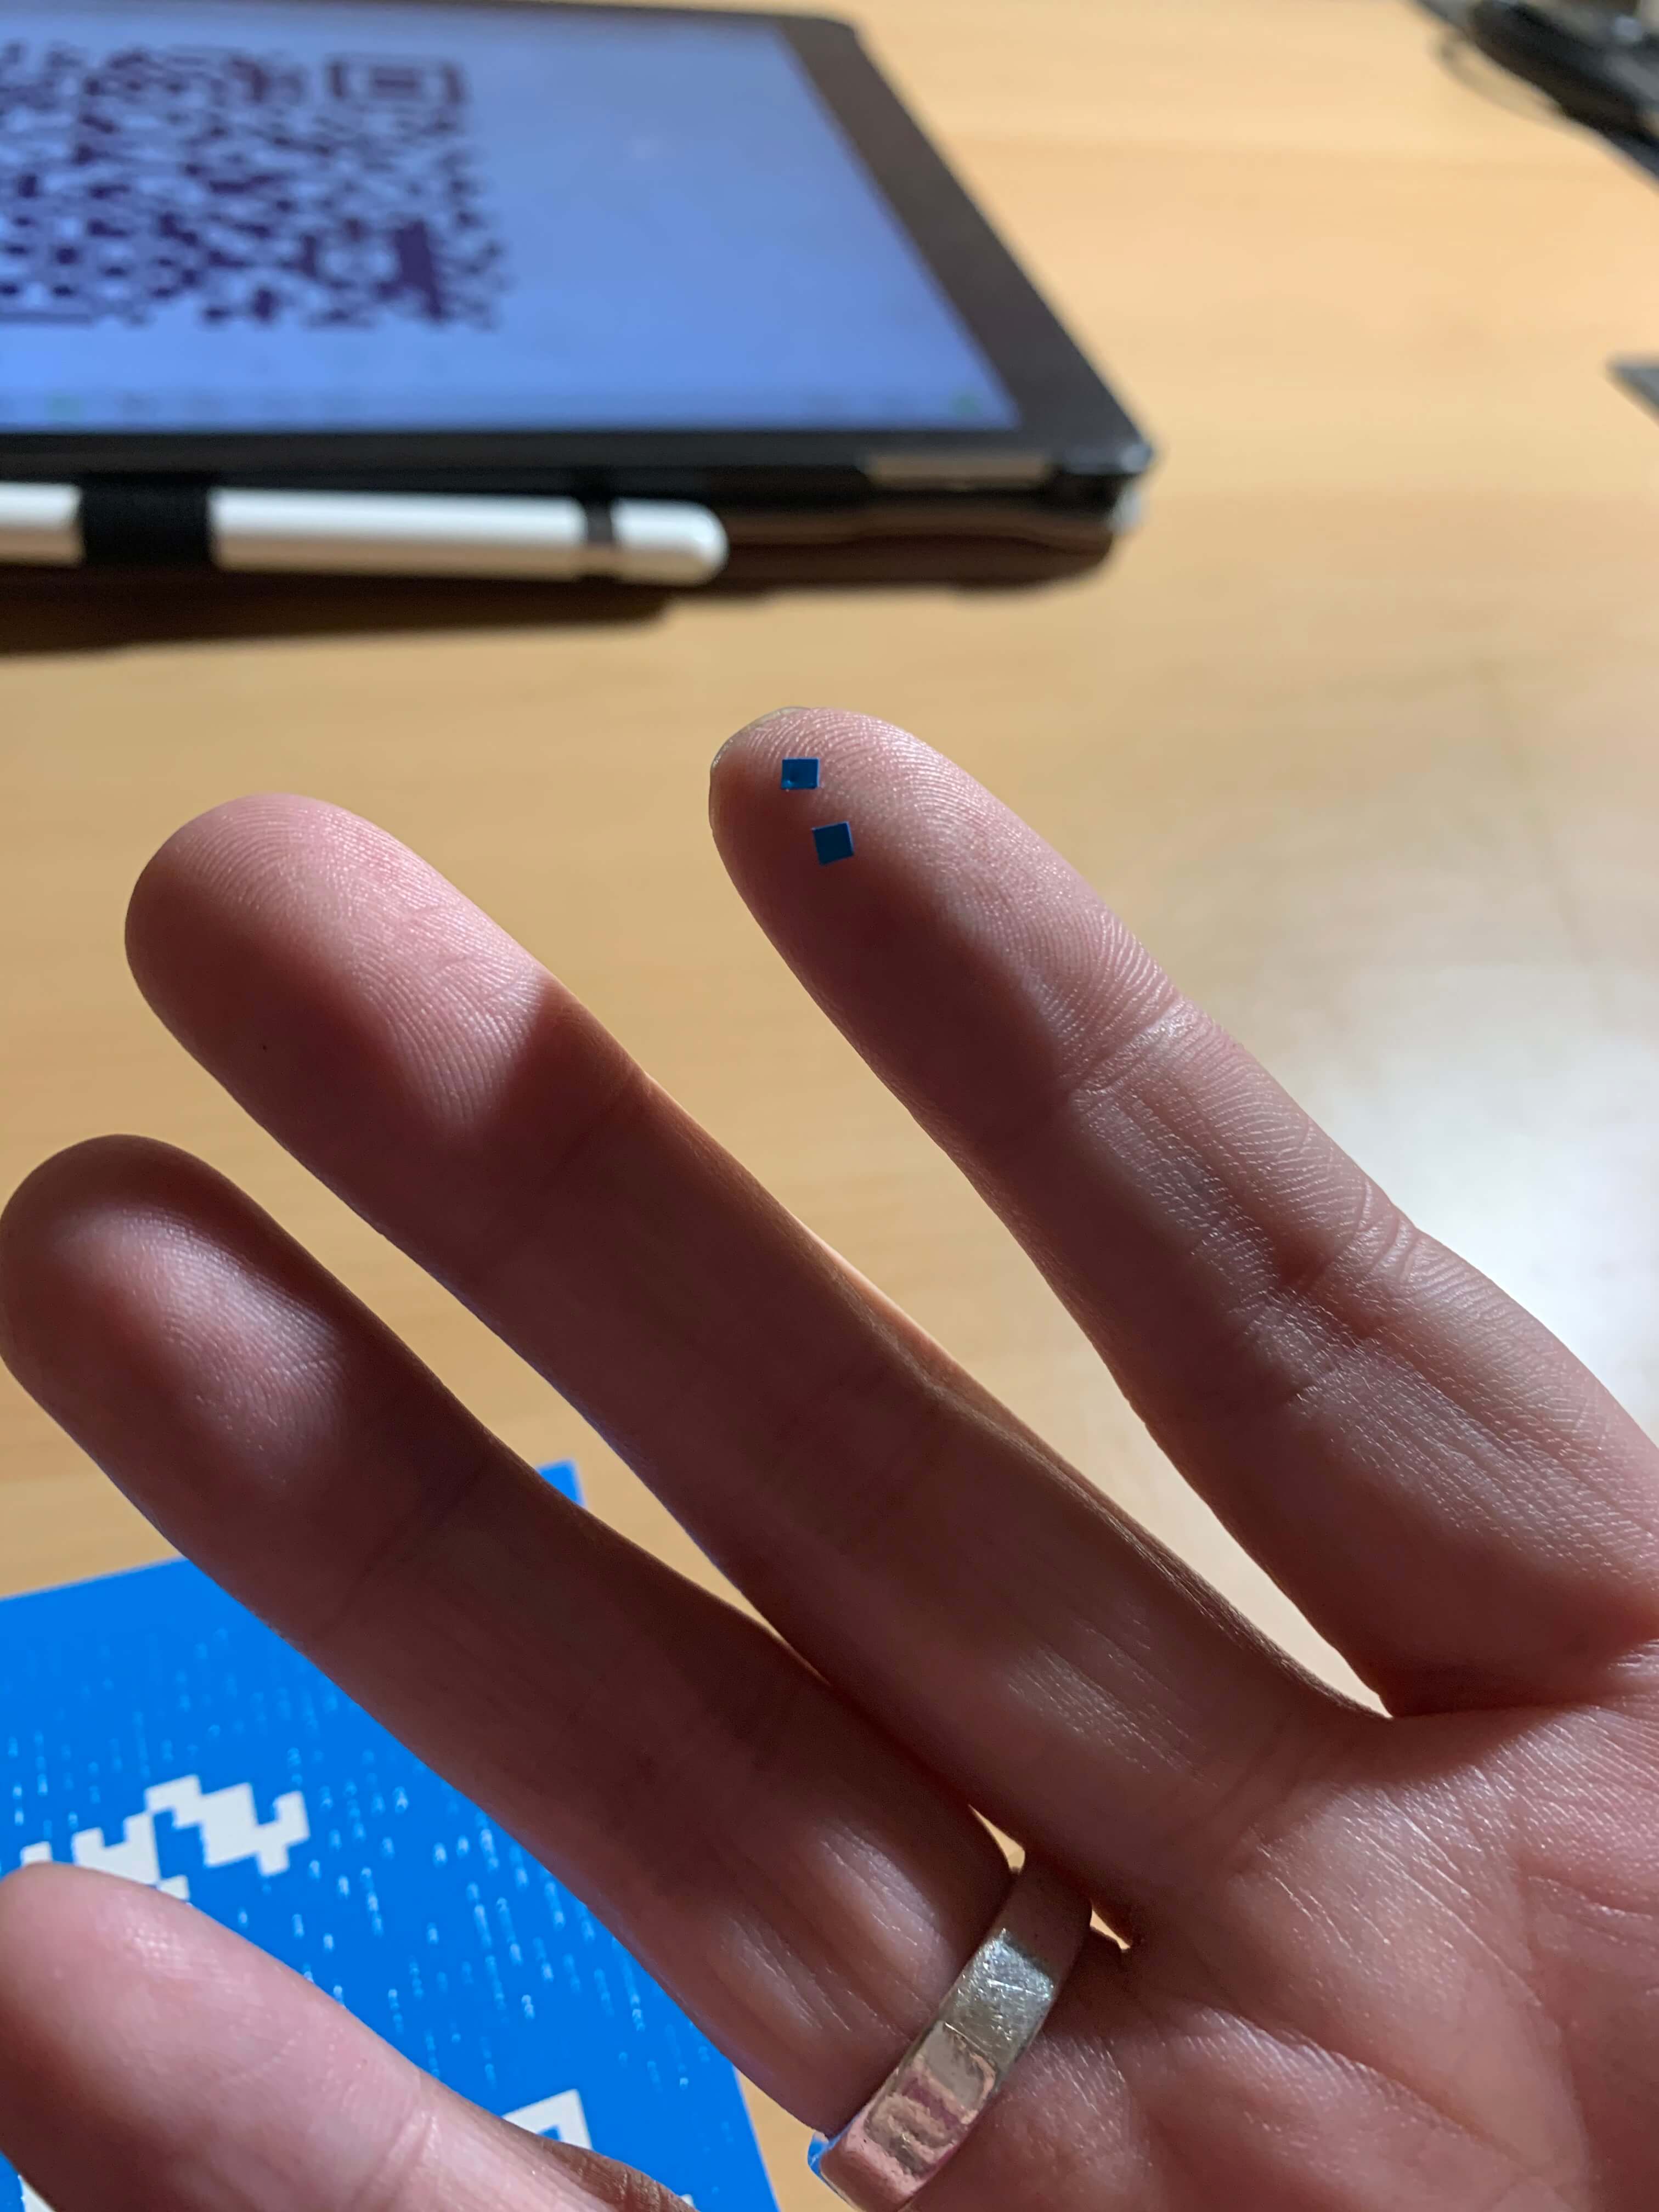
Weeding QR codes is the most difficult part, but it's so worth it in the end! I used a straight tipped weeding tool along with needle nosed tweezers. It's also very helpful to have the image of the QR code up as reference, to make sure you're weeding out the proper parts of the code. I like to start with removing the easy parts first, the areas on the inside that aren't connected to anything else.

When I remove the small single squares, I like to keep them on hand in case I need to reconstruct any parts that may get accidentally removed during the weeding process.
Occasionally while weeding, some of these small parts will stick to the areas you're trying to remove, but don't worry! Just use the tip of your weeding tool to hold it in place while removing the rest with your tweezers. Then you can wiggle it back into position with your weeding tool.

I find this weeding process incredibly satisfying, especially when there's the big, winding pieces you can remove all at once!
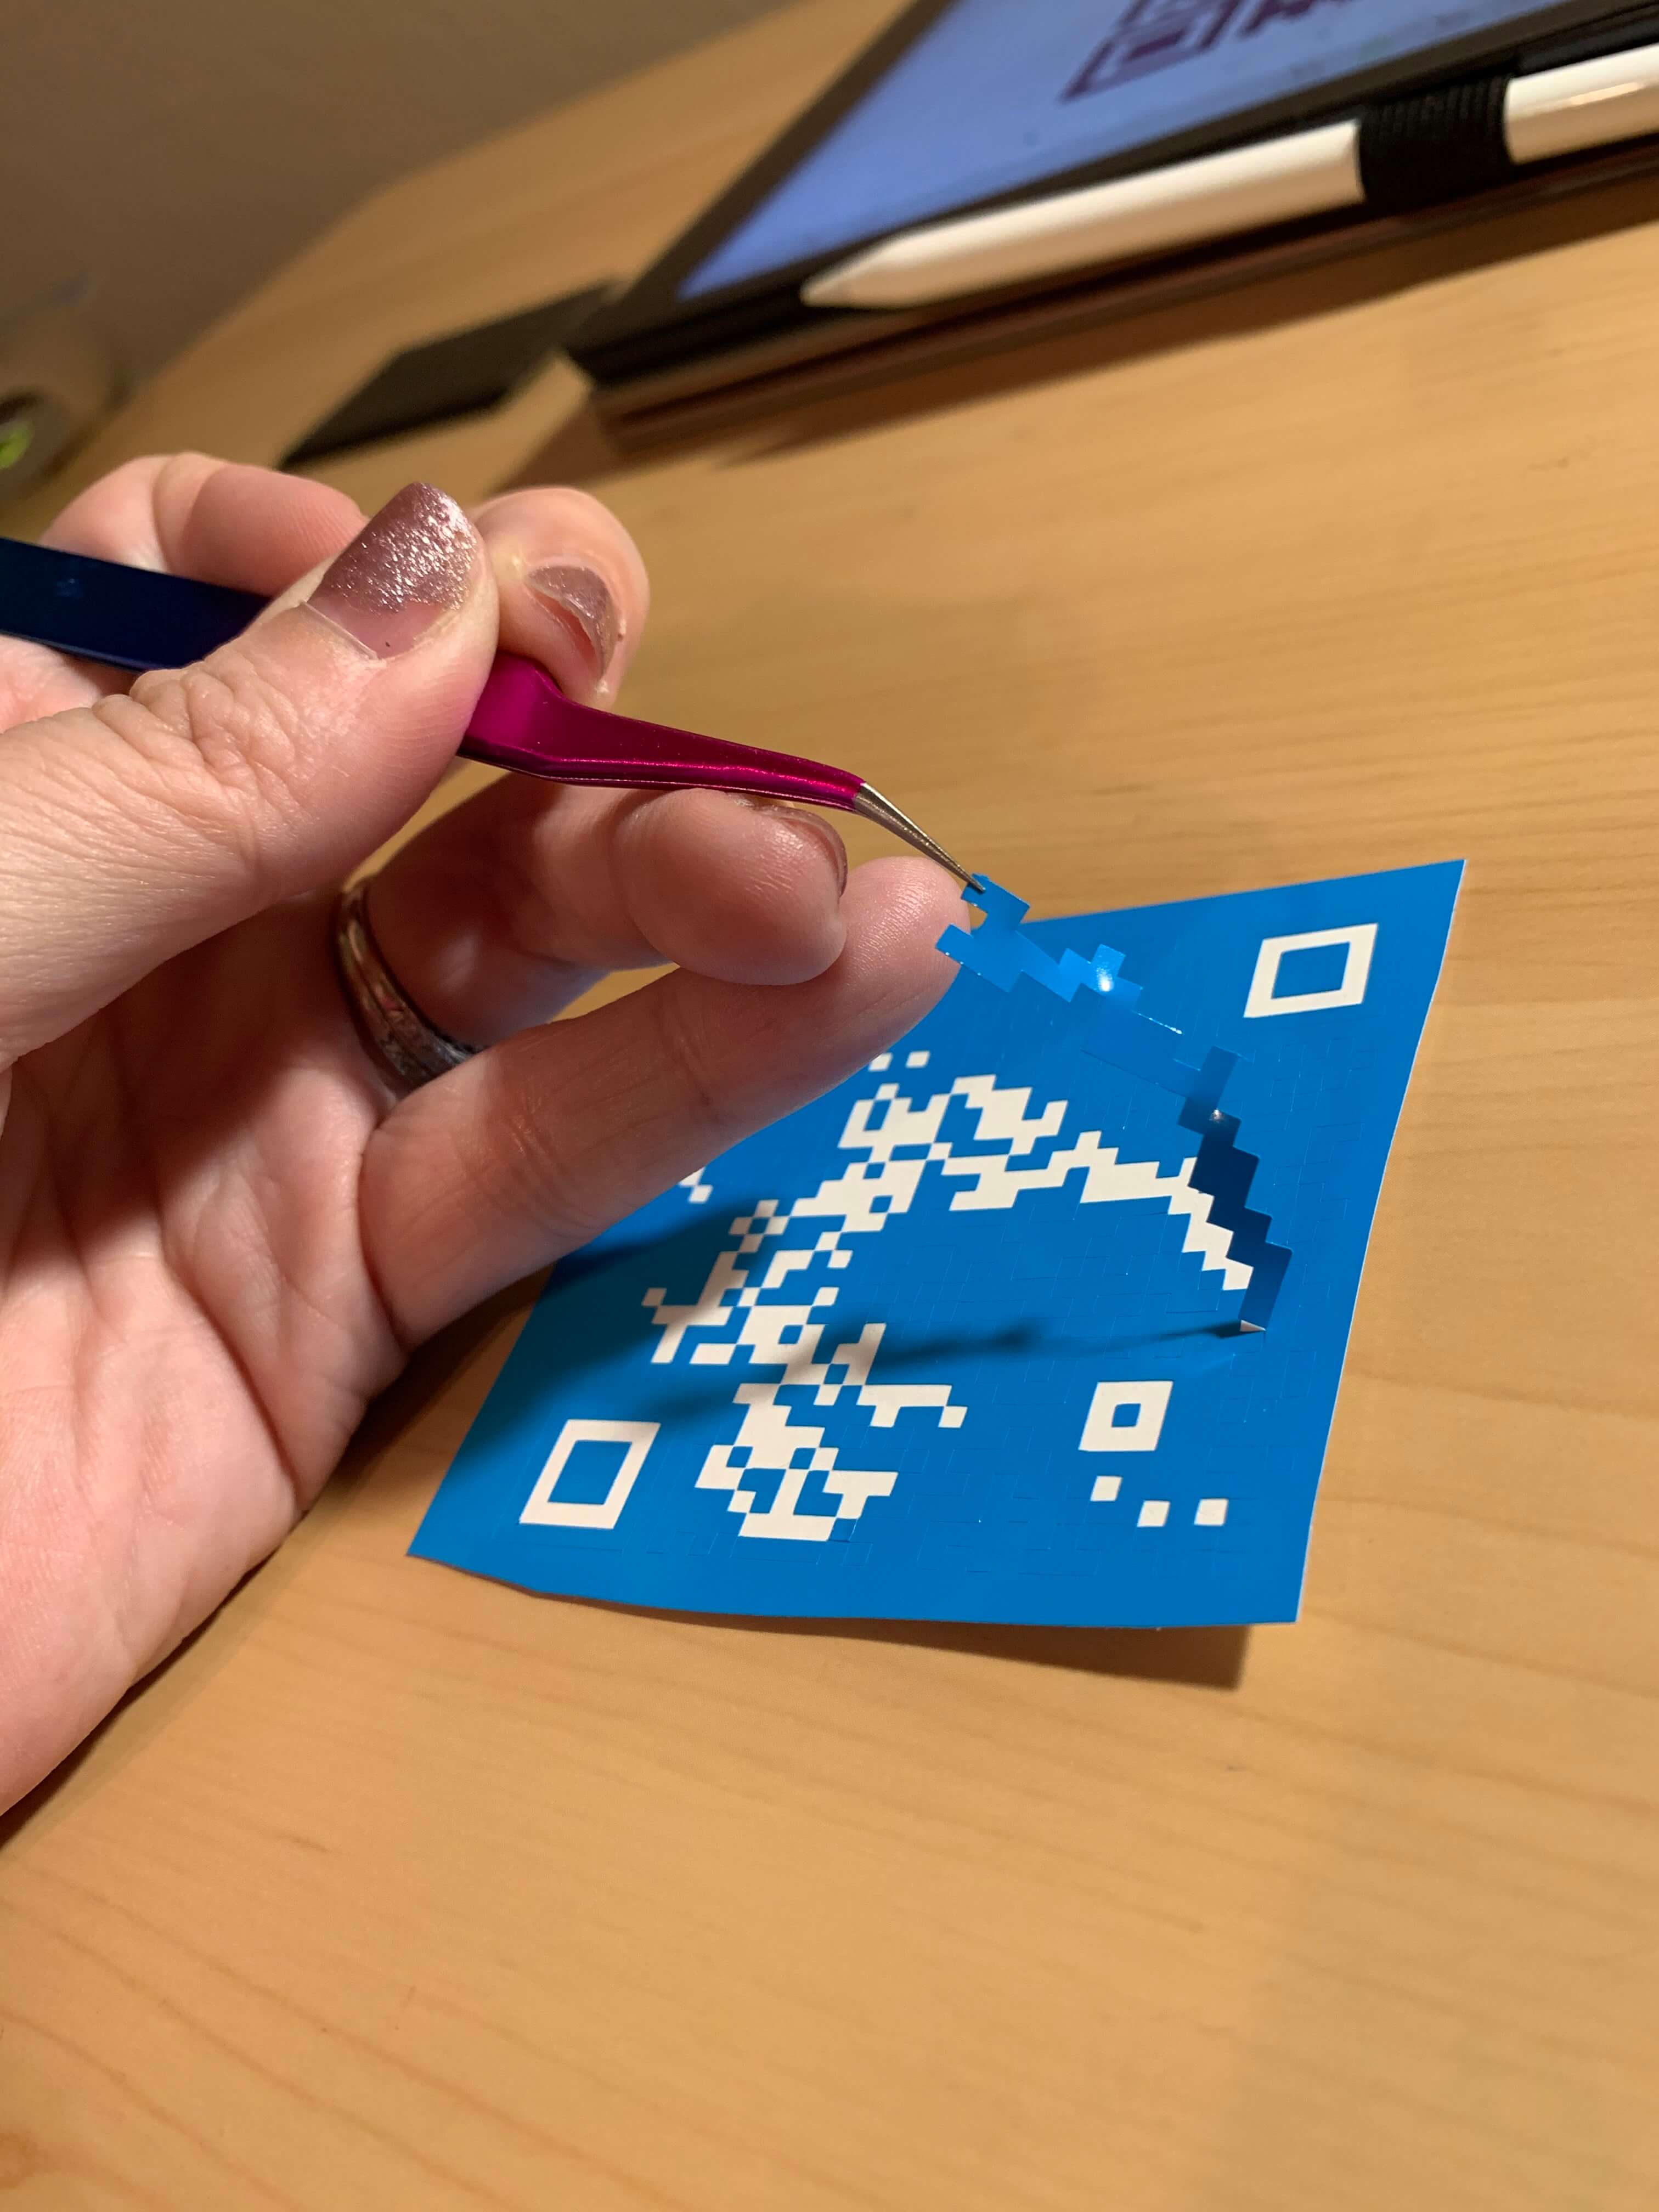
Keep a close watch on how your vinyl compares to the image of QR code. If a square has gone missing, just use one of the squares you have in reserve and put it in place.
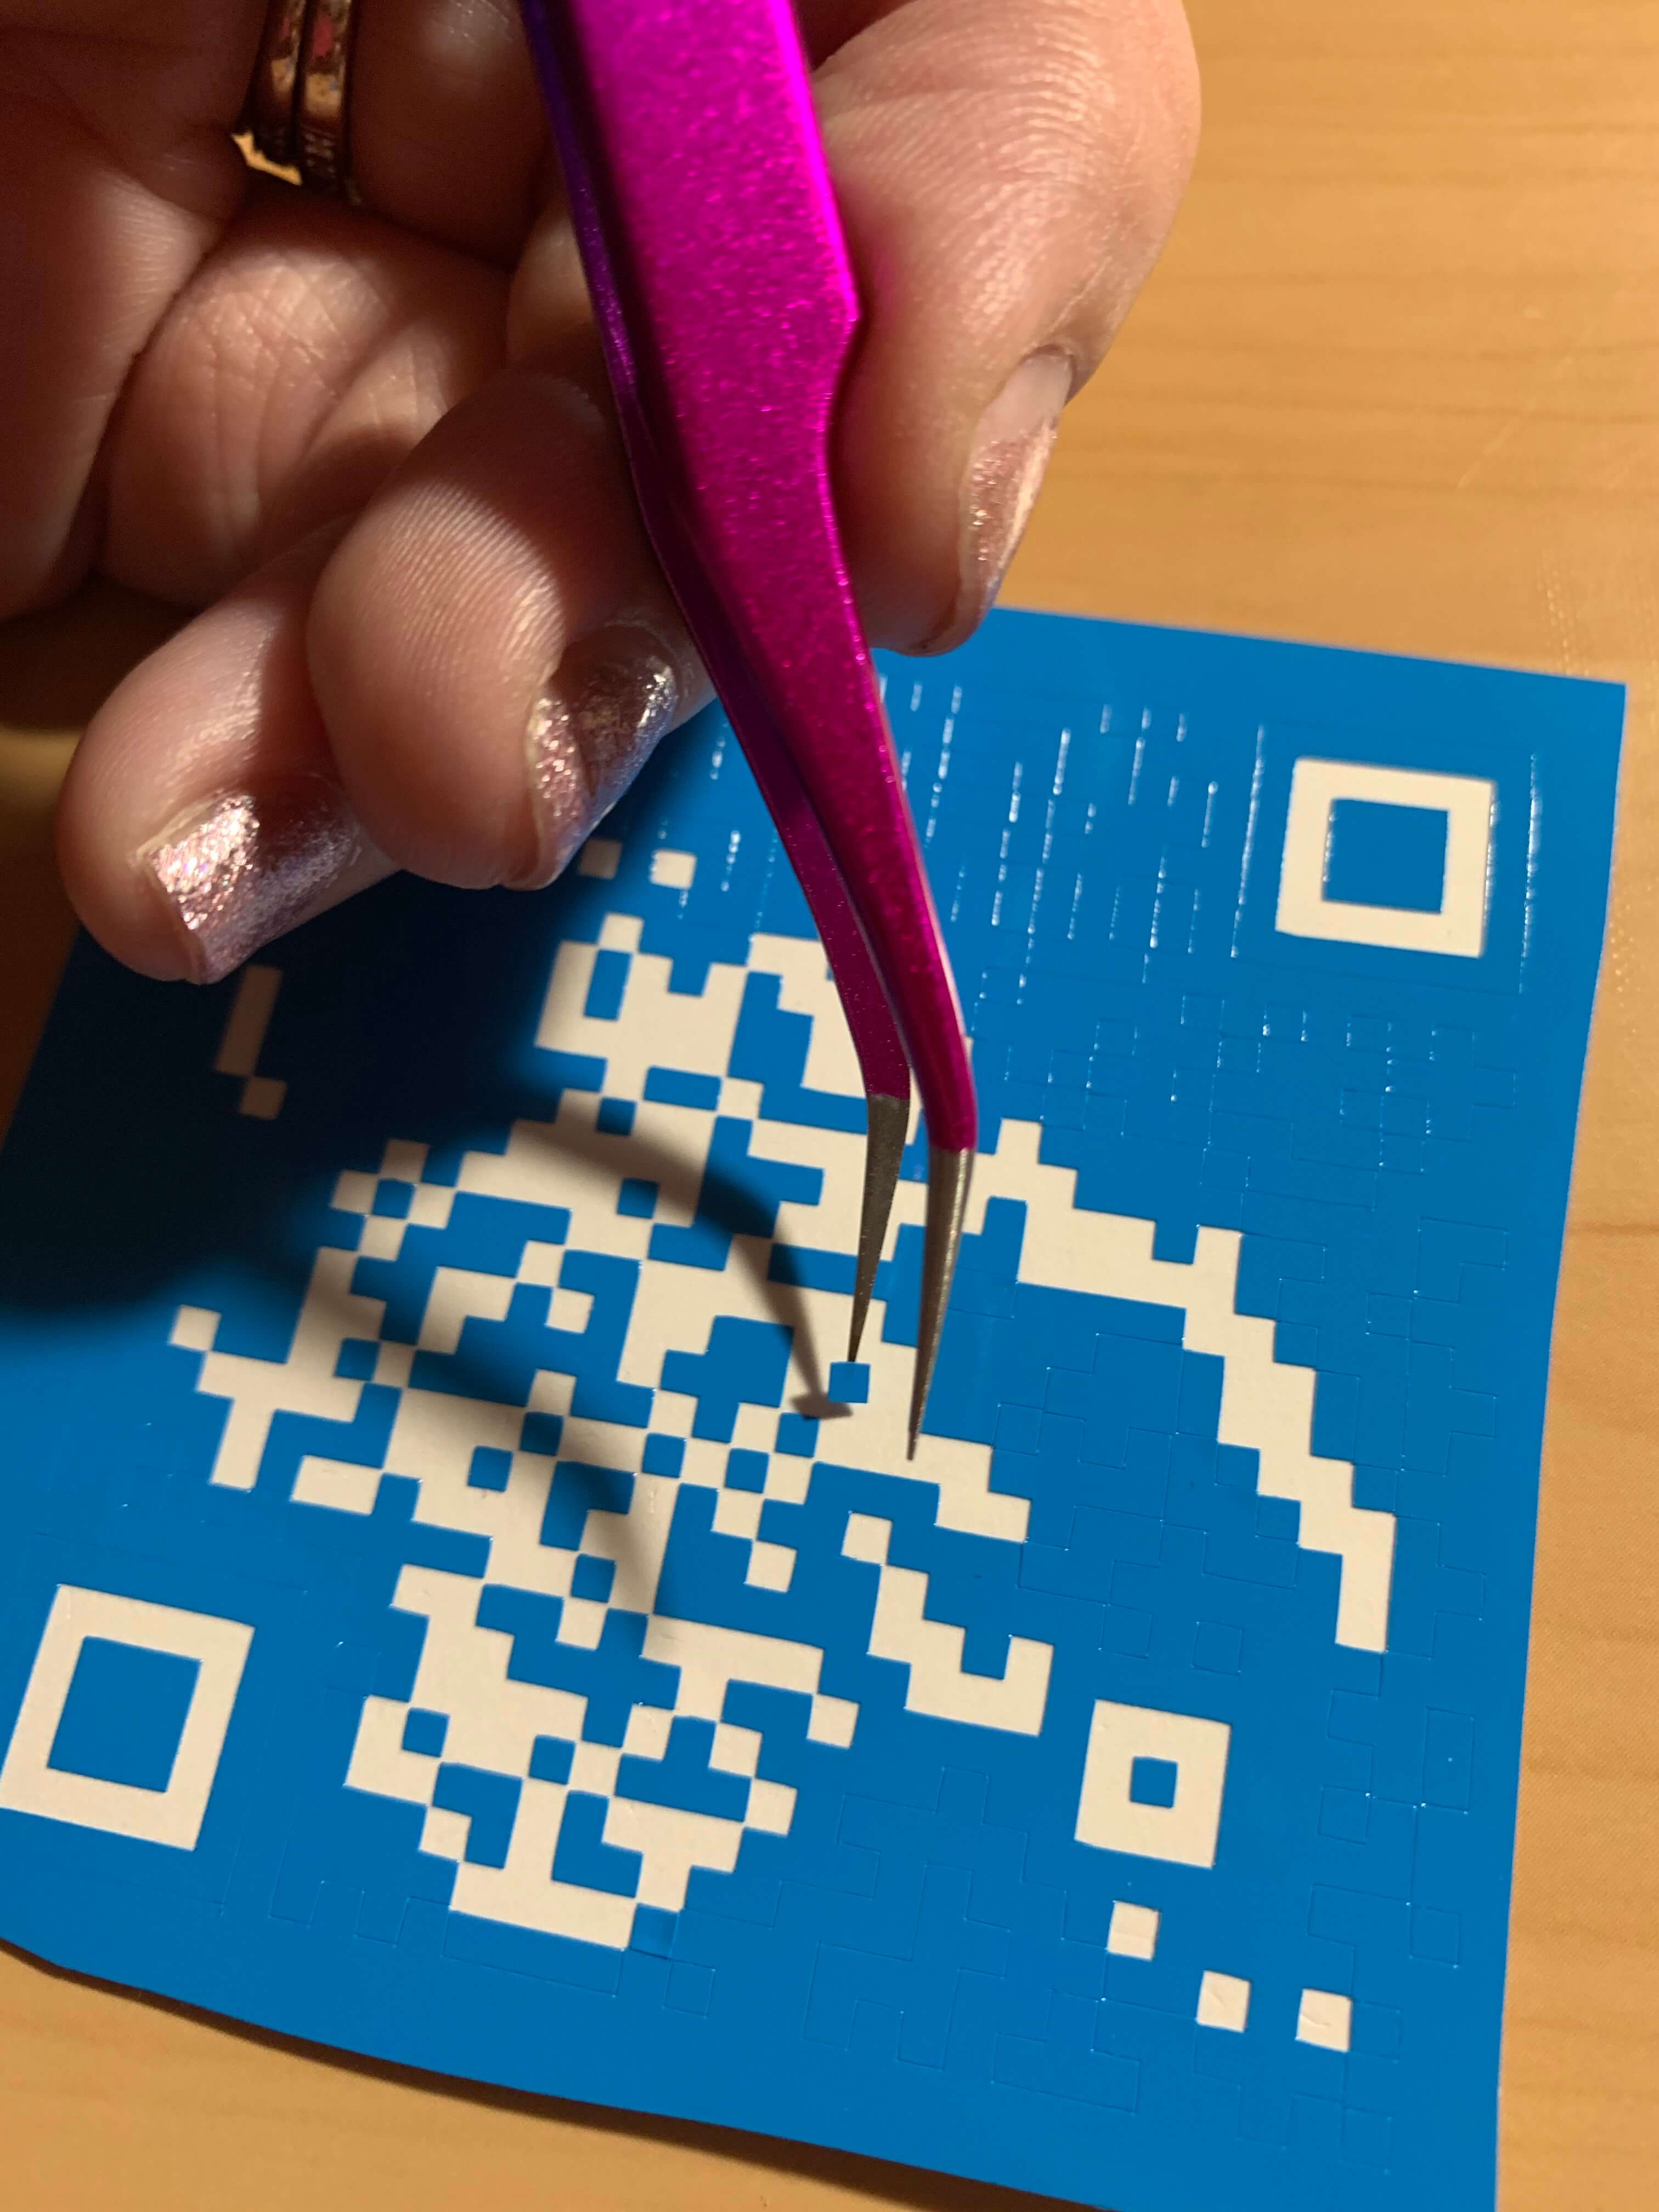
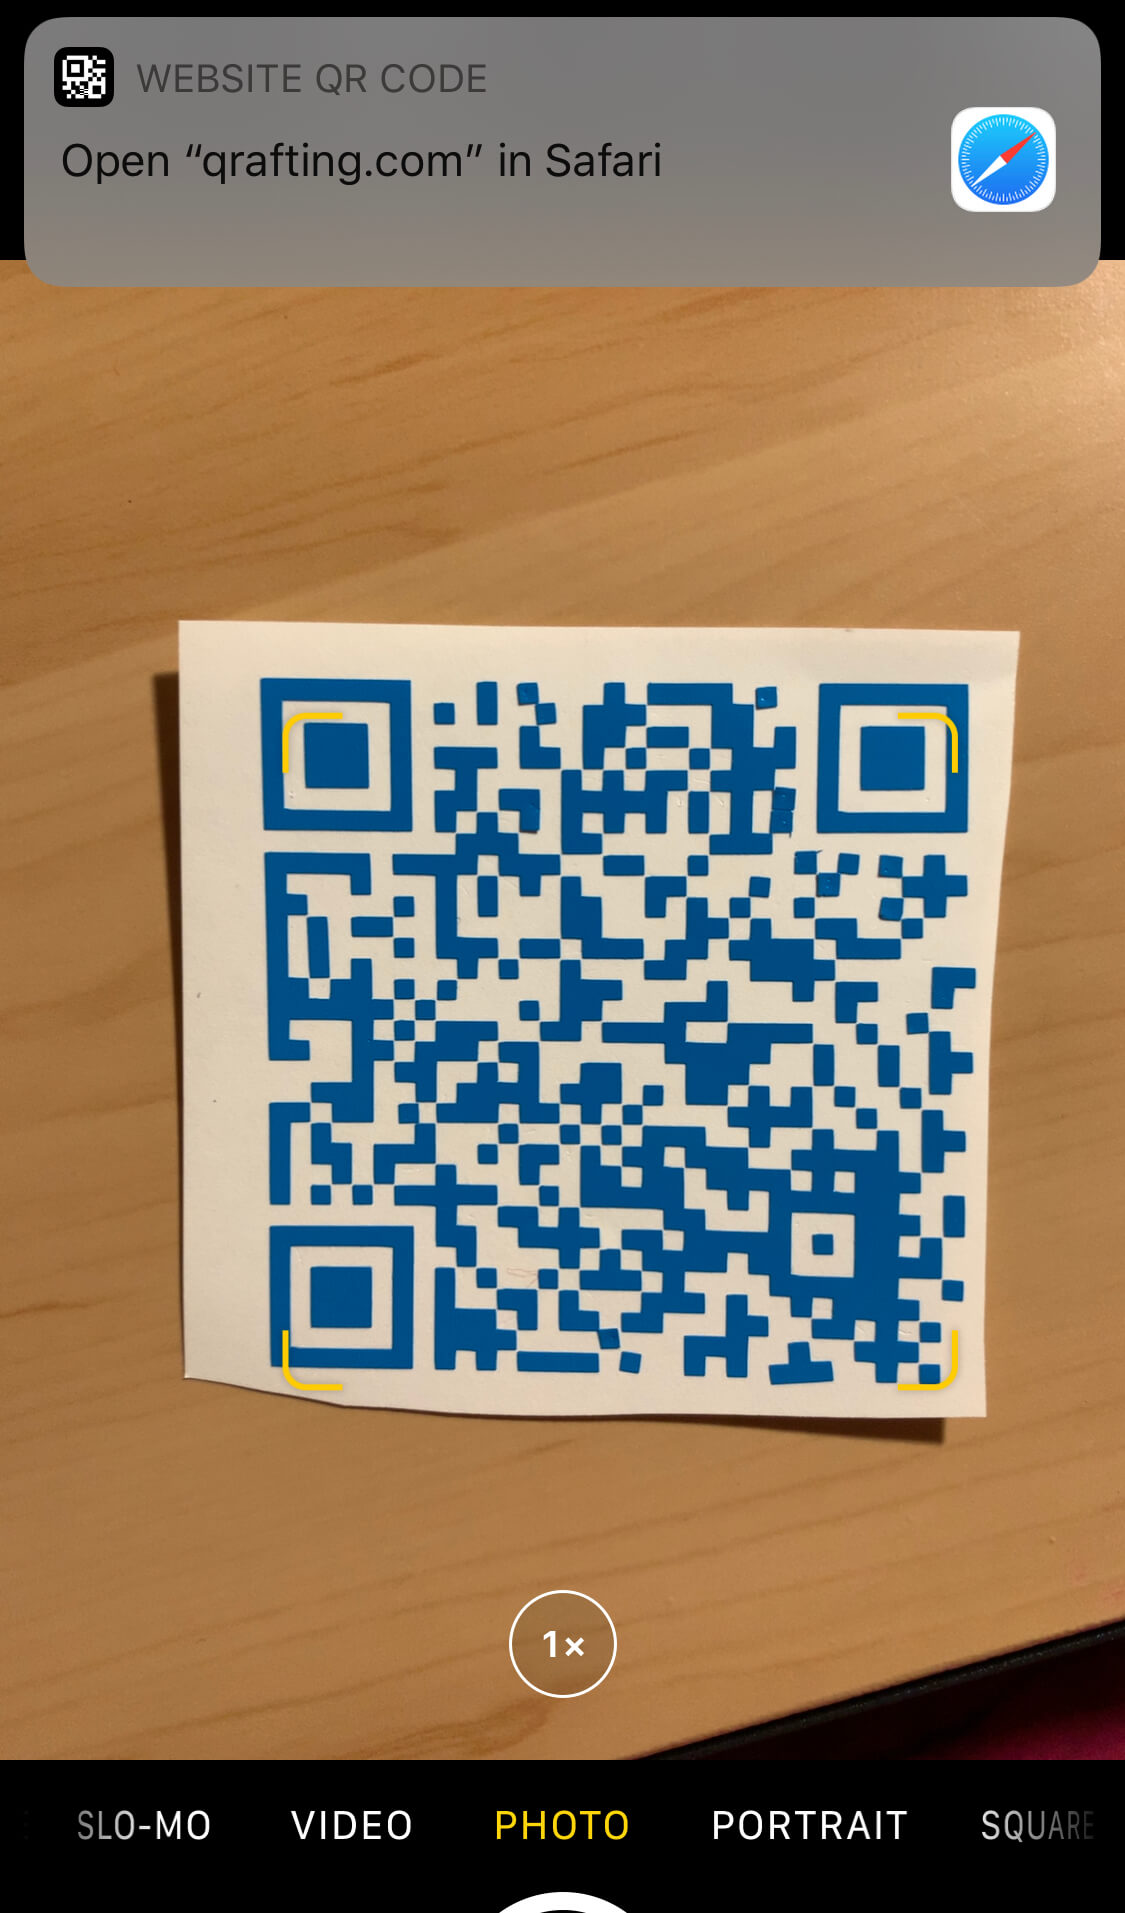
The outer areas can be the trickiest parts to weed, so I will start at one corner and snip it into pieces as I'm weeding it. Once it's fully weeded, I'll test it with my phone to ensure that nothing was damaged in the process. If I've done everything right, I can open my camera on my iPhone and point it at the QR code, and a link will appear at the top of the screen to access my uploaded files.
Now it's simply a matter of using transfer tape to transfer the vinyl to the back of the snowflake and voila! You have a beautiful memory snowflake to hang on your tree!
Any questions? Feel free to contact us!
Snowflake SVG:
